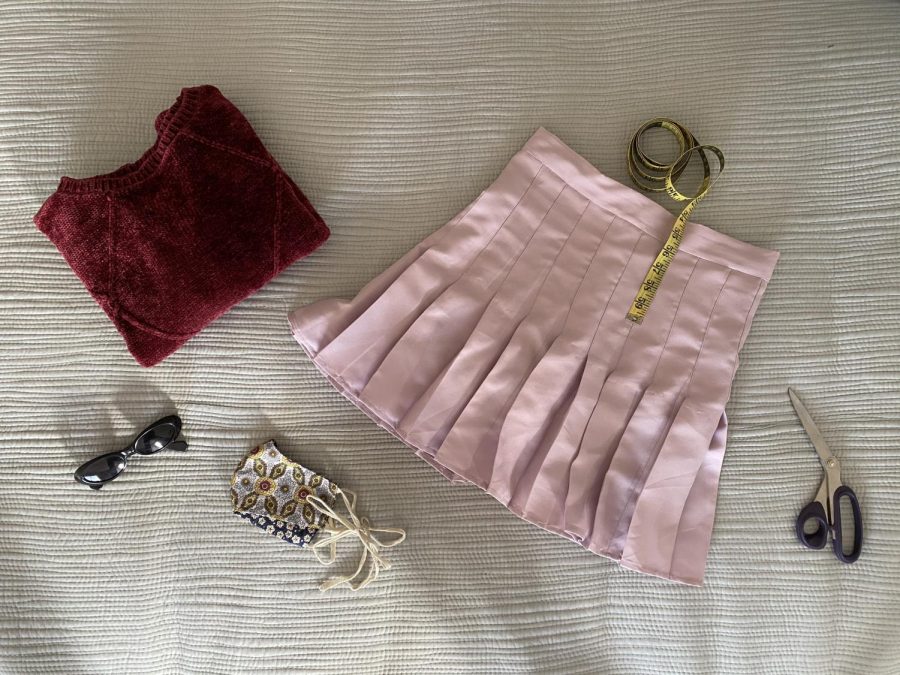
Tennis skirts: one of the most recent fashion trends that gained a lot of its popularity this summer. They are the perfect junction of many of the styles we favor today; their look feels vintage, they are a little preppy, have that Brandy Melville vibe, and can be styled many different ways. Dress them up with some sandals, or dress them down with a hoodie and sneakers, really any style is possible. Luckily, they are super easy to make yourself.
There are plenty of reasons to make your own clothes; it is cheaper, more sustainable, and you can tailor your clothes to fit your body perfectly, just to name a few.
A concept that has recently gained more momentum in sustainable fashion is thrifting old bedsheets, tablecloths, and even curtains for your fabric goods. These items can easily be found around your house or in any local thrift and antique stores.
With that, let’s get to making.
If you are new to sewing, this is a simple project to start with. The garment is made up entirely of rectangles, and the zipper feature makes for helpful practice too. Ideally, you would have a sewing machine for this, but you could definitely hand sew this tennis skirt if you have the patience.
You can make this skirt with any type of fabric, as long as it is not too sturdy – you will want your skirt to have some movement. This is a pleated skirt, and pleats use up a lot of fabric, meaning you will need about two yards of your material. However, the fabric piece does not need to be very wide, so you might be able to get away with buying less material and piecing together some smaller panels (like I did) to reach the length you need for your skirt piece. You also need a 10” invisible zipper, scissors, thread, a measuring tape, pins, an iron, and a sewing machine (unless you decide to hand sew this).
Step One – Taking measurements, doing some math, and cutting fabric
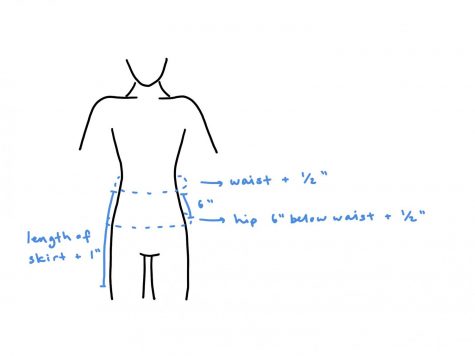
For this project you will need three measurements. The first is your waist measurement, so the smallest part of your waist, plus half an inch for ease. The second measurement is of your hip circumference, six inches below your waist, plus half an inch for ease. Finally, you need to choose the length of your skirt. I recommend about 17 inches long, plus an inch for seam allowance. For the skirt length, it is better to cut the fabric a little too long because you can always make it shorter if you want.
Multiply your waist measurement by three, then divide that by one and a half, which is the pleat width. Now you need to adjust that number, so that when divided by three it creates a whole number. Add or subtract anywhere between a quarter inch and one inch to ‘three times waist’, so that when divided by one and a half, it is divisible by three. Make sure to adjust your original waist measurement to compensate for and length change in ‘three times waist’.
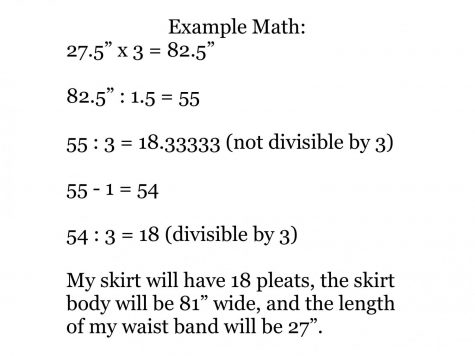
Now, we can get to cutting the pieces. For the body of the skirt, cut a rectangle that is ‘three times your adjusted waist measurement plus an inch for seam allowance’ by ‘your desired skirt length plus an inch for seam allowance.’ The waist band is another rectangle that is ‘four inches plus and inch for seam allowance’ by ‘your adjusted waist measurement plus one inch for seam allowance.’ This creates a two–inch waistband.
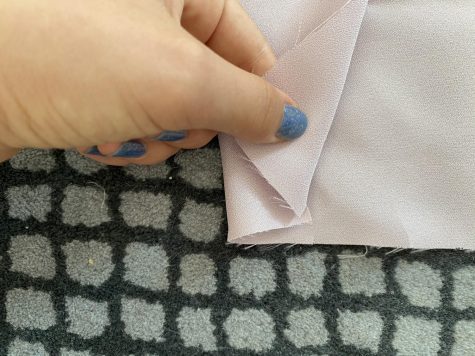
If the fabric piece you have is not long enough, just cut panels – do not forget the extra inch for seam allowance on each one – and then stitch them together to make one long piece before starting.
Once those are cut, you are ready to start making the pleats!
Step Two – Making the pleats
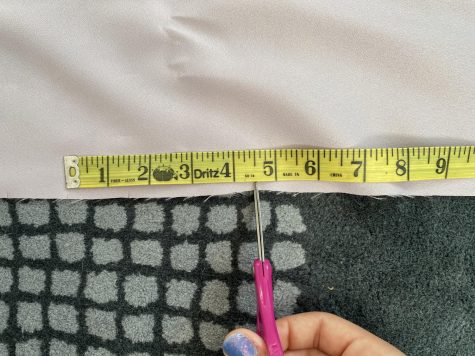
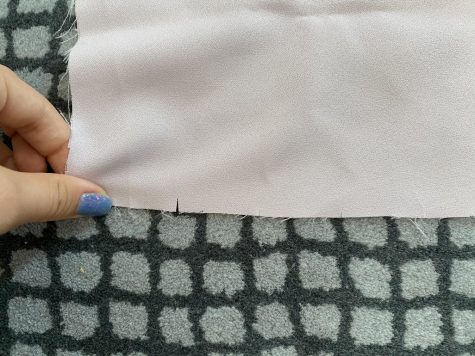
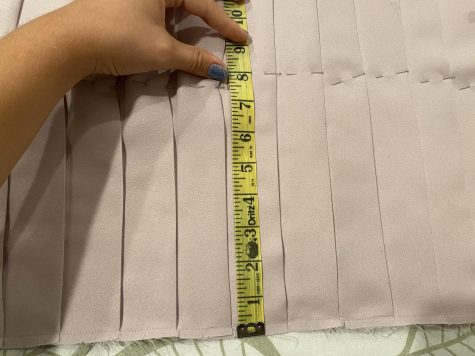
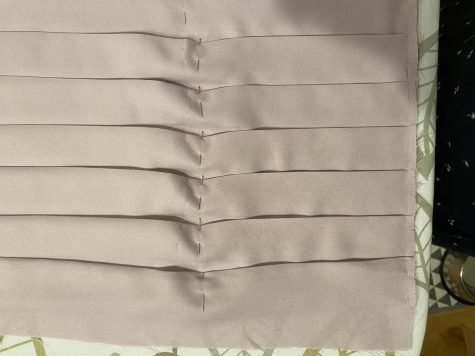
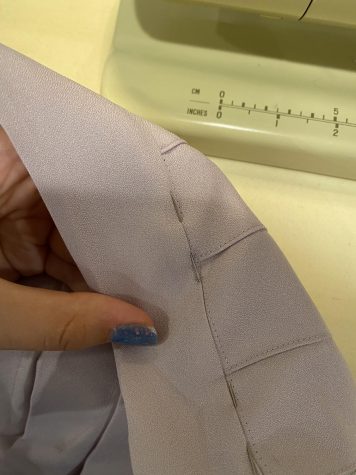
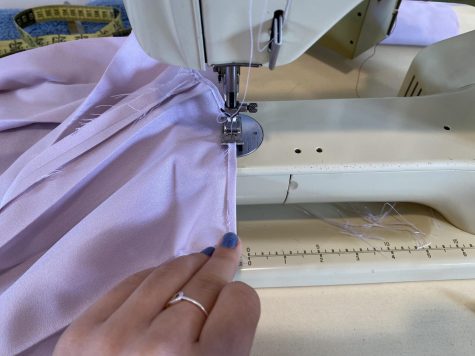
Gather your skirt body piece, and a ruler. On the long edge of your fabric, mark two inches inward from the side. You can do this with a pen, or even making a small cut in the fabric at that point. After that first notch, continue to cut notches one and a half inches apart until the edge of the fabric. Then, repeat this on the other side.
Holding the first notch, fold the third notch on top of it, then lay the fabric flat on the fold, so the first and third notches are touching, and the second and fourth notches are touching. Do this on the top and bottom, then pin the fold in place. Repeat the same process, except now act as though the fourth notch is the first notch to make the next pleat. Continue all the way down the skirt until all the pleats are pinned into place.

Now you need to press those beautiful pleats into place! You should iron and steam them to make sure the folds are really set into place and will stay neat during the sewing.

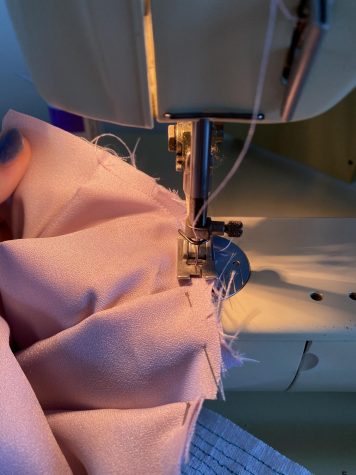
As an optional step, you can stitch the pleats down on one side really close to the edge with a long basting stich just to hold them in place.
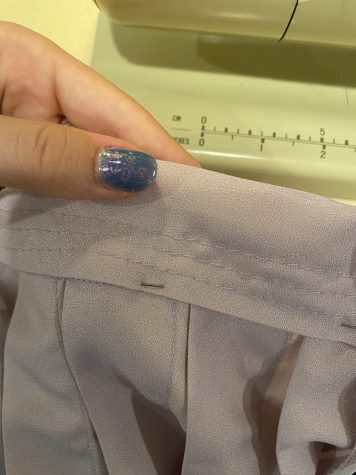
Step Three – A little more math to sew the pleats
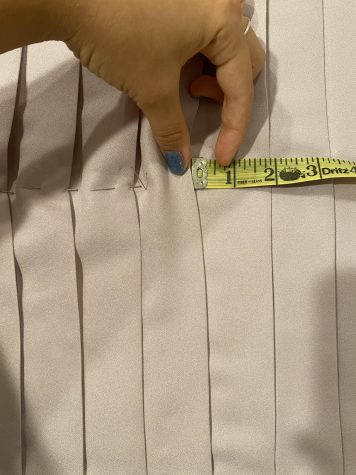
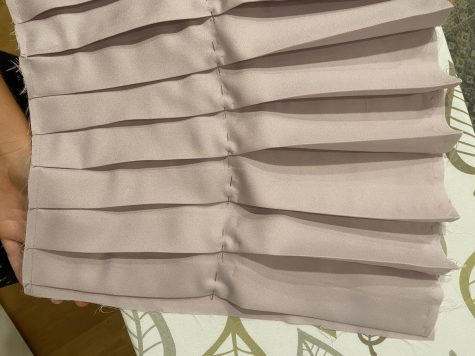
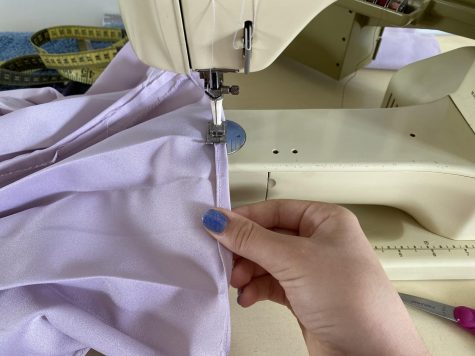
Remember that other hip measurement you took six inches below your waist? Now we need to do some more math to accommodate for the difference between your waist and hip measurement. Take the hip measurement you made and subtract your adjusted waist measurement. Then, divide that difference by the number of pleats you made.
The resulting decimal is the distance you need to move your pleats over, away from their natural placement. At six and a half inches below the top of your skirt piece, move your pleats over by that decimal. Follow the graphic for a more straightforward visual of this process.
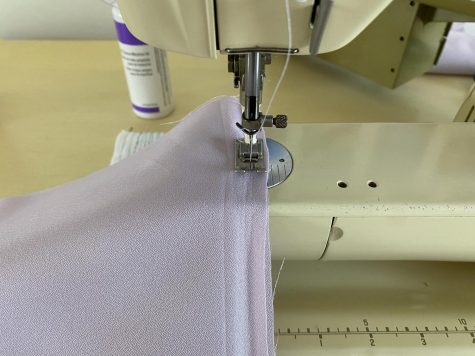
Once you have pinned over all the pleats, top stitch them down until you reach the six-and-a-half-inch point, securing them into place.
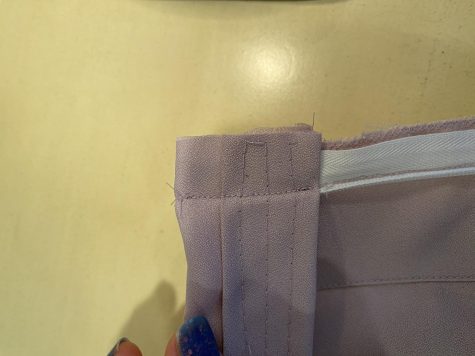
Step Four – Attach the waist band
Fold the waistband piece in half and press with an iron. Next, pin the waist band right sides together with the outside of your skirt piece about one and a half inches away from the edge. Stitch the band to the skirt half an inch in from the edge of the waistband. The reason you need to place the waist band so low onto the skirt body rather the stitching them together at their edges is, so the skirt sits on your waist, instead of above it. The three layers of fabric there also make for a sturdy waistband.
Step Five – Installing the zipper
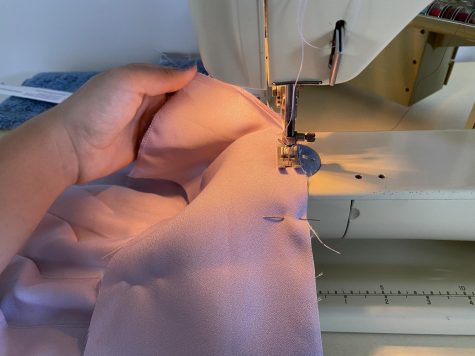
Following the directions on the packaging of your invisible zipper, go ahead and install that. Make sure to pay attention to where your seam allowances end, so that when the zipper is closed, the adjacent pleats meet nicely.
Next, flip the waistband over so that it is inside out. Sew a small seam along the zipper, which is currently between the waistband, down to the end of the waistband. When you flip that out, your zipper will be perfectly finished. Do this on both sides.


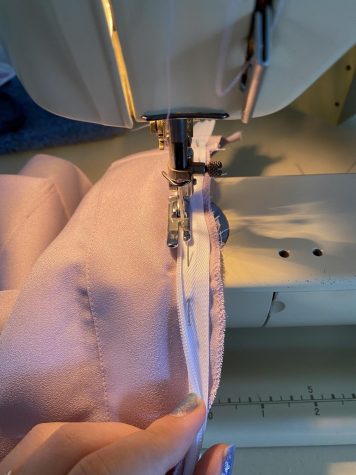
With the zipper installed, now you can stitch together your skirt below the zipper. If you cannot get close enough to the end of the zipper on your machine, hand stitch closed the gap between zipper and machine stitching.
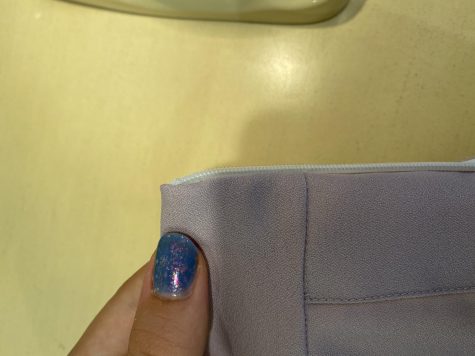
Step Six – Completing the waistband
Flip the rest of your waistband to the inside of your skirt. Tuck under the raw edge and pin the created fold just below the first seam you made on the waistband in step four. Turning the skirt so the outside is facing you, begin to stitch right into the “ditch” where the skirt and waistband meet. This way, you will catch the inside of the waistband, but make the seam invisible from the outside.
However, the “stitch in the ditch” method can be pretty tricky. You can easily decide to skip that, by pinning the inside of your waistband above for first seam and stich it down from the inside. This will create a nice topstitch on the outside.
Step Seven – Hemming
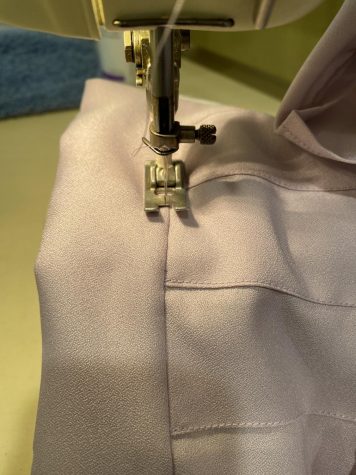
The last step is to hem your skirt! The easiest way to do this is simply to fold the bottom edge in once by half an inch and stitching it down, folding in again by half an inch and stitching it down. This creates a double rolled hem, enclosing any raw fabric edges.
And your skirt is complete! Enjoy your new skirt that is perfectly tailored to you. You now have bragging rights not only for your talent, but also for being sustainable in a world, where it is becoming increasingly difficult to do so.
Additionally, if you still do not grasp some of the details, there are plenty of super helpful YouTube tutorials out there you can refer to. Also feel free to email Nichola Monroe (‘20) if you are having trouble!